Pega Constellation: Connect REST Integration Walkthrough
Learn how to use the Pega Integration Wizard to create Connect REST rules, data pages, and automate data modeling from JSON responses.
Connect REST Integration Walkthrough
In Pega Constellation
Why use the Integration Wizard?
Accelerates development by automatically generating data models from JSON responses.
Eliminates manual errors in class structure and property mapping.
Provides a visual interface to configure complex API connections (GET, POST, etc.).
Creates reusable Data Pages and Connect Rules instantly.
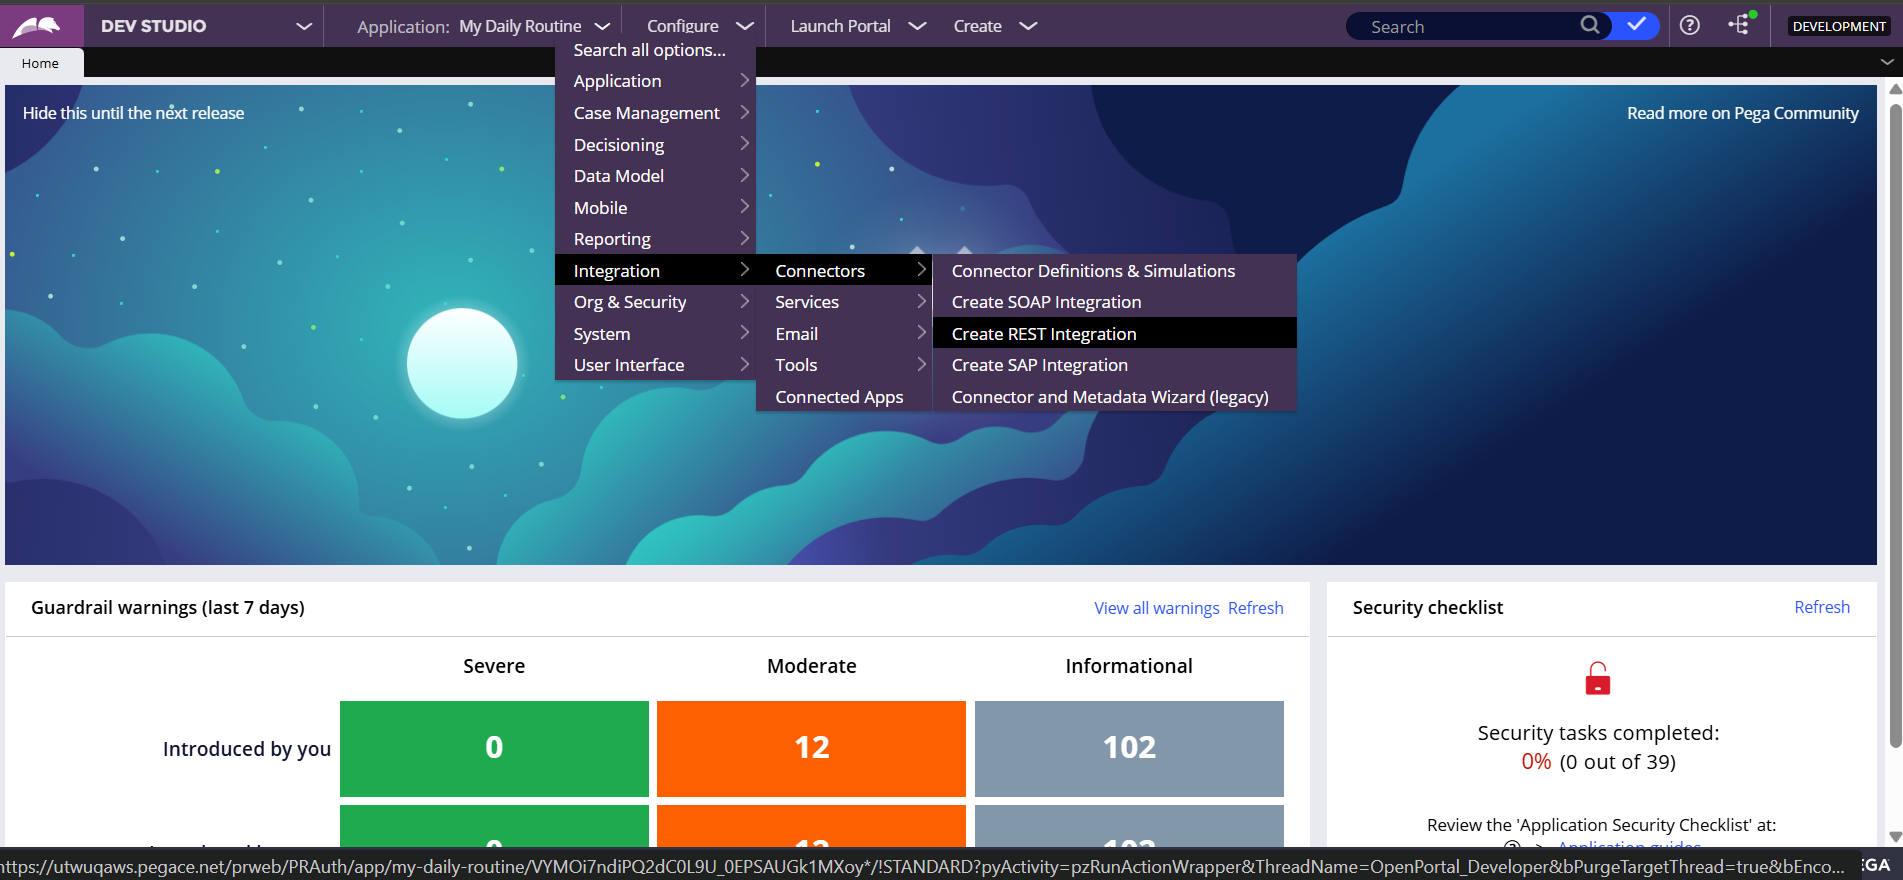
Step 1: Access the Wizard
Navigate to the Integration menu in Dev Studio. Select 'Connectors' and then 'Create REST Integration' to launch the guided wizard.
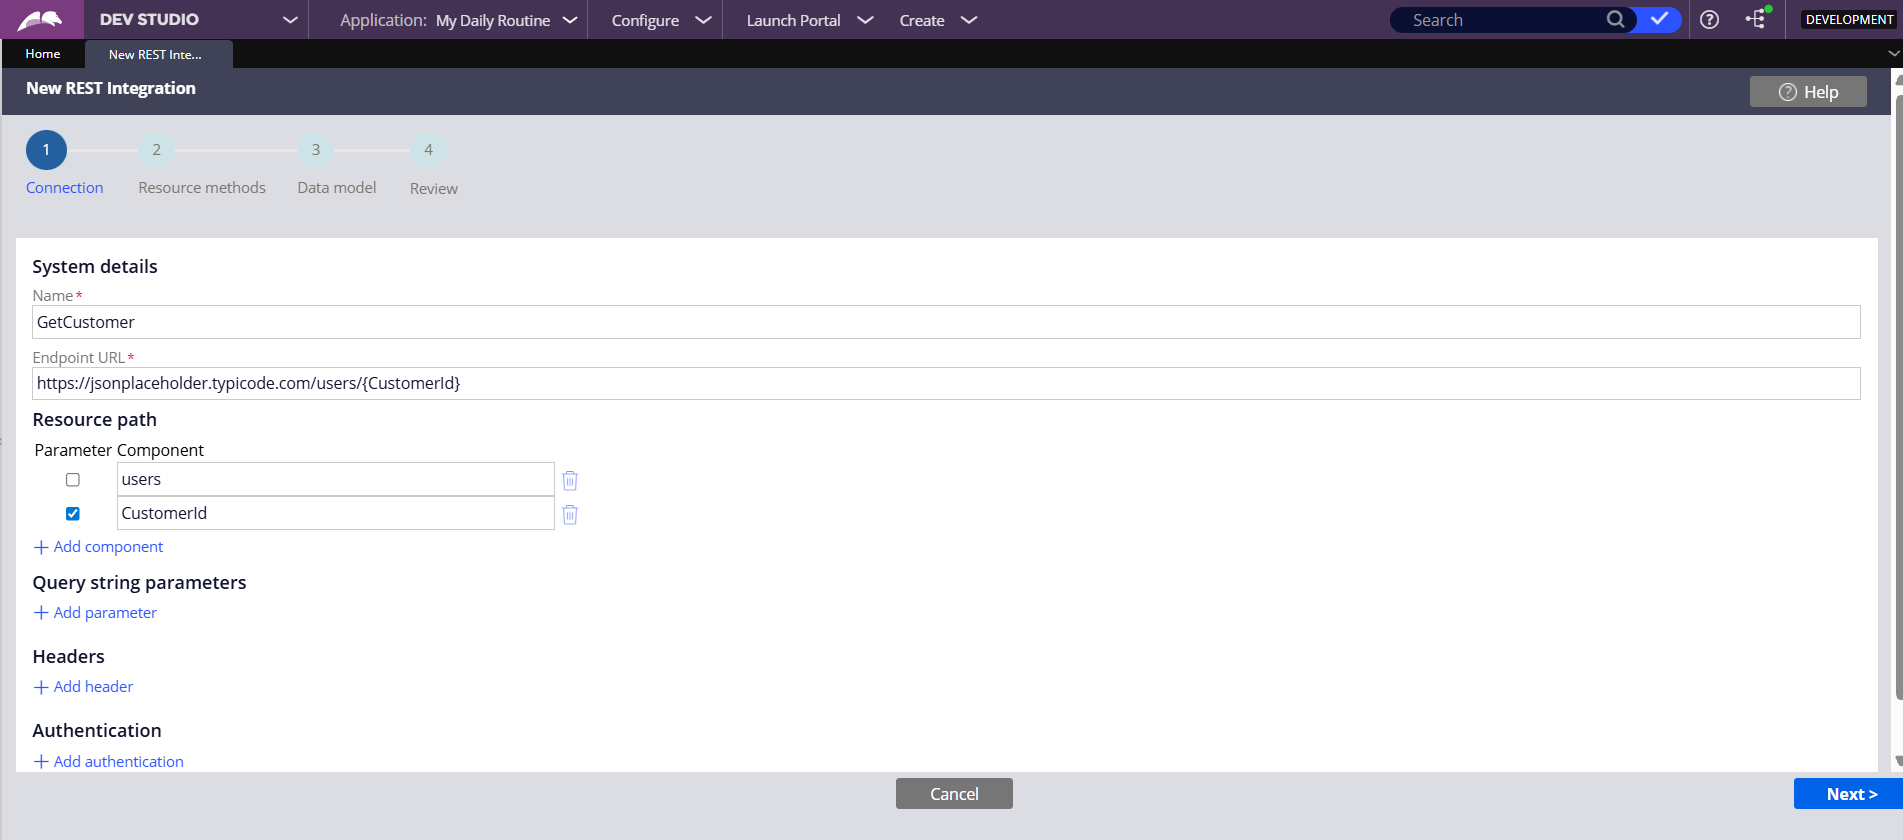
Step 2: Define Connection
Enter the Name and Endpoint URL. You can define dynamic resource path parameters, such as {CustomerId}, which will be mapped automatically.
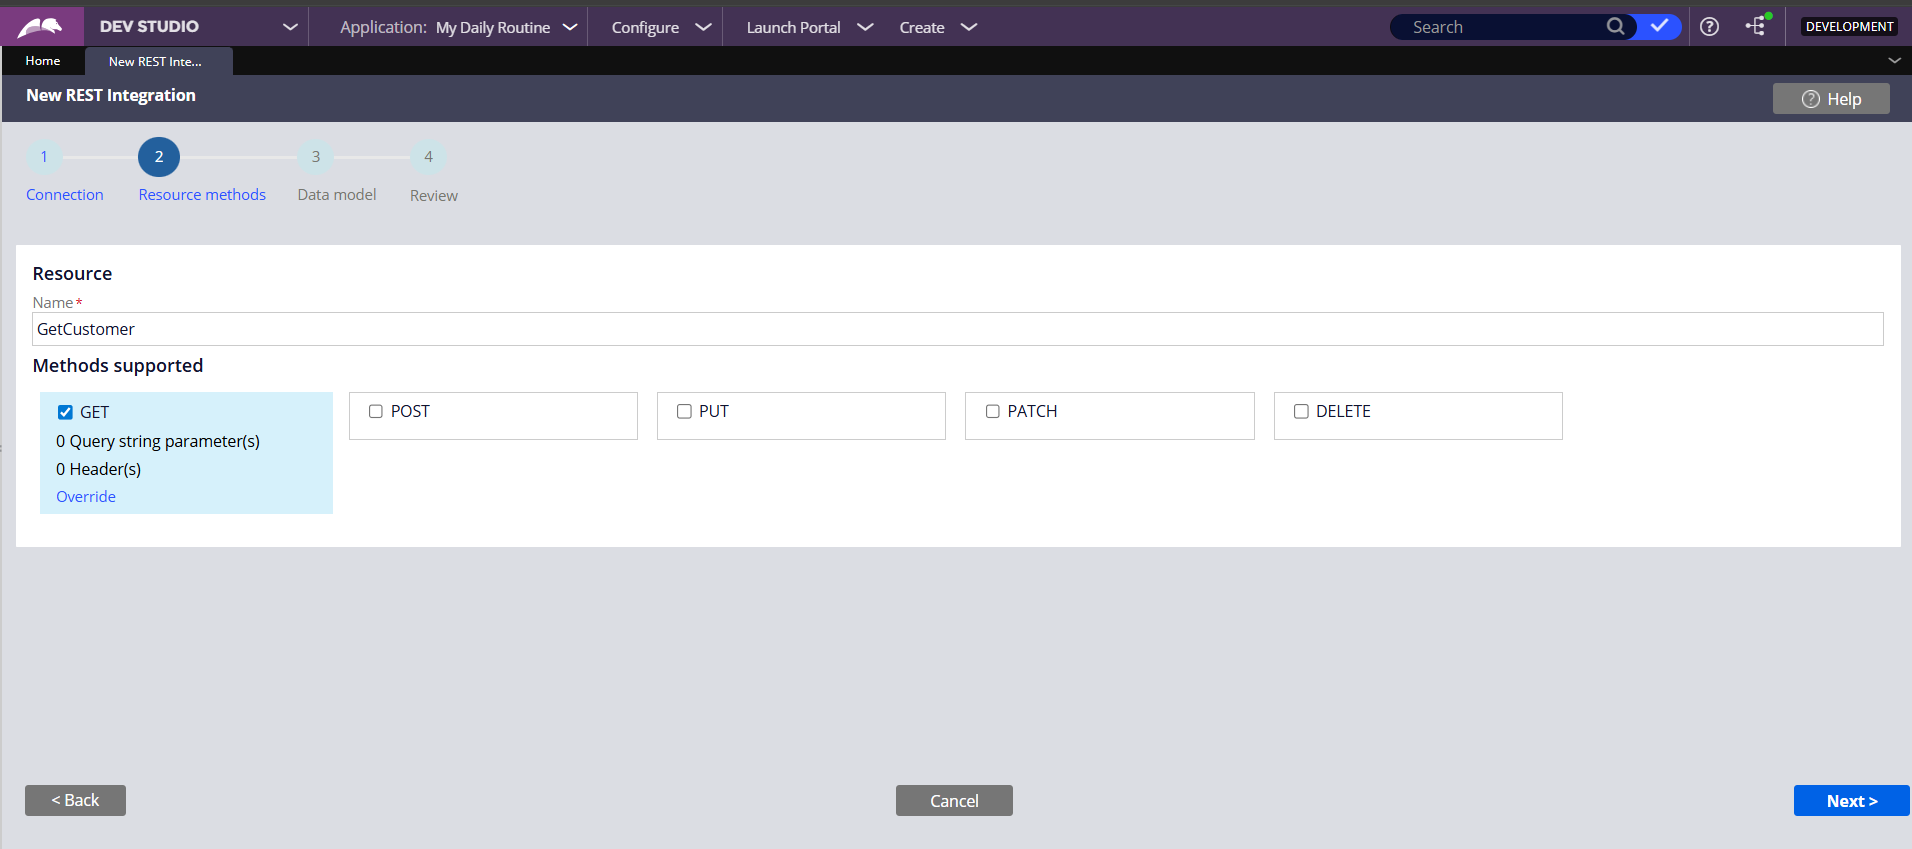
Step 3: Select Methods
Choose the HTTP methods required for your integration (GET, POST, PUT, etc.). Here, we select GET to retrieve customer information.
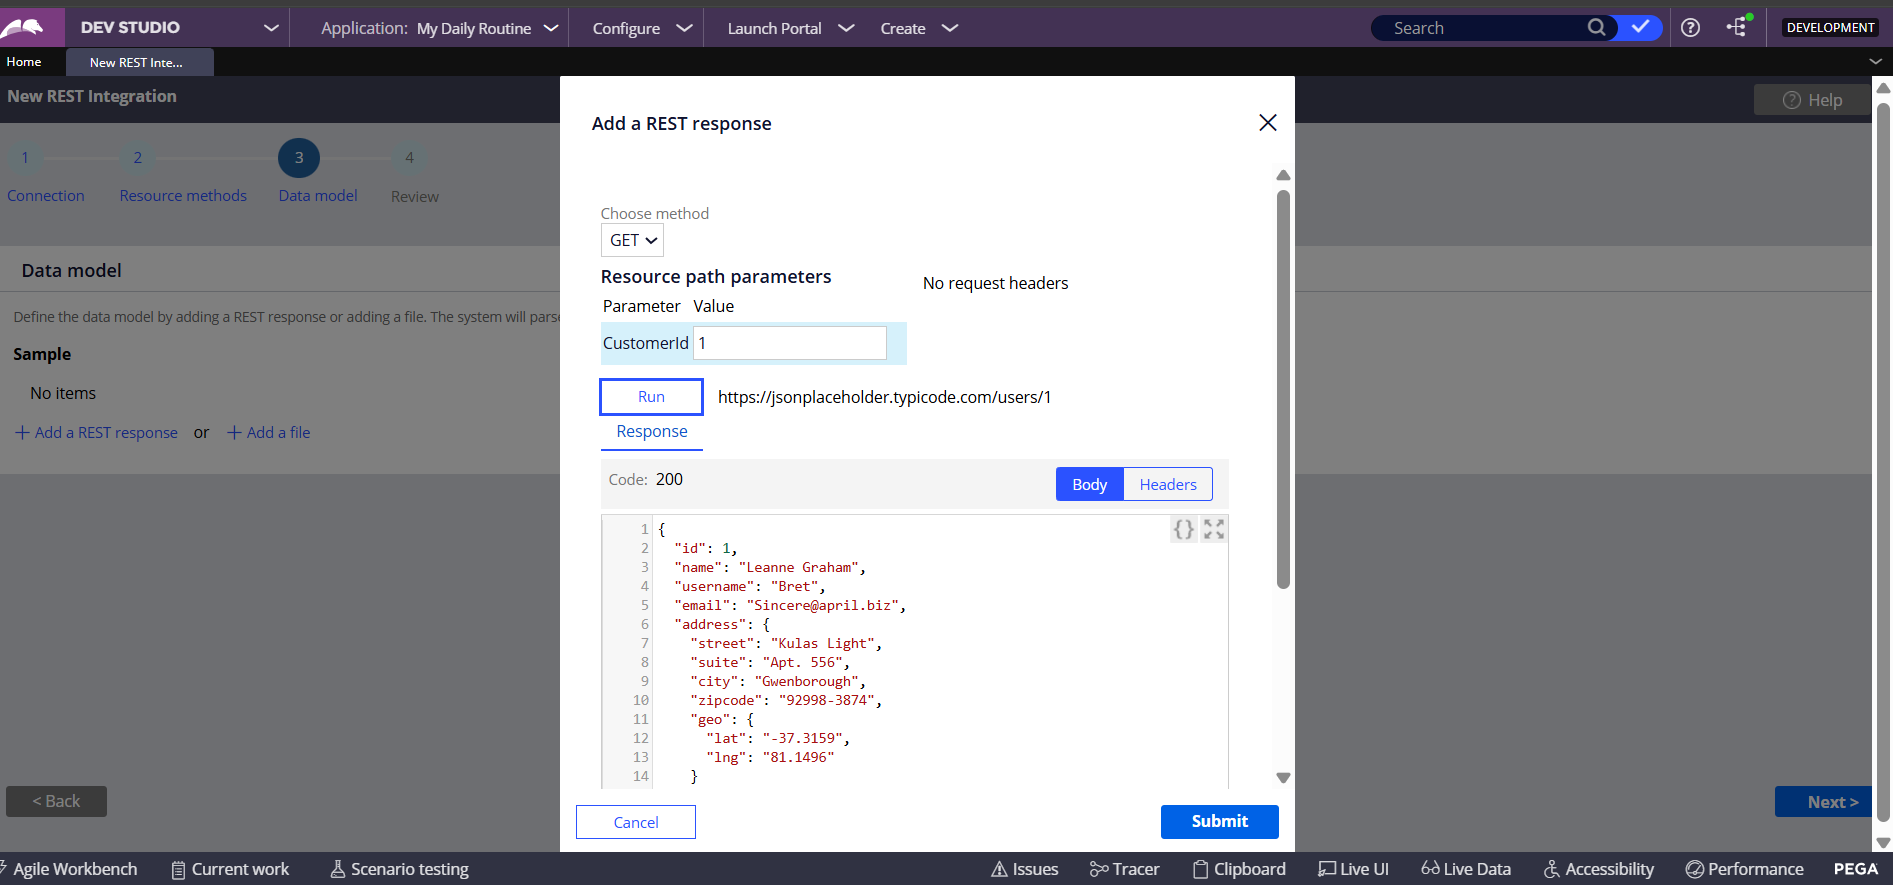
Step 4: Data Modeling
Test the connection with sample data directly in the wizard. The system parses the JSON response (e.g., name, email) to build the data model automatically.
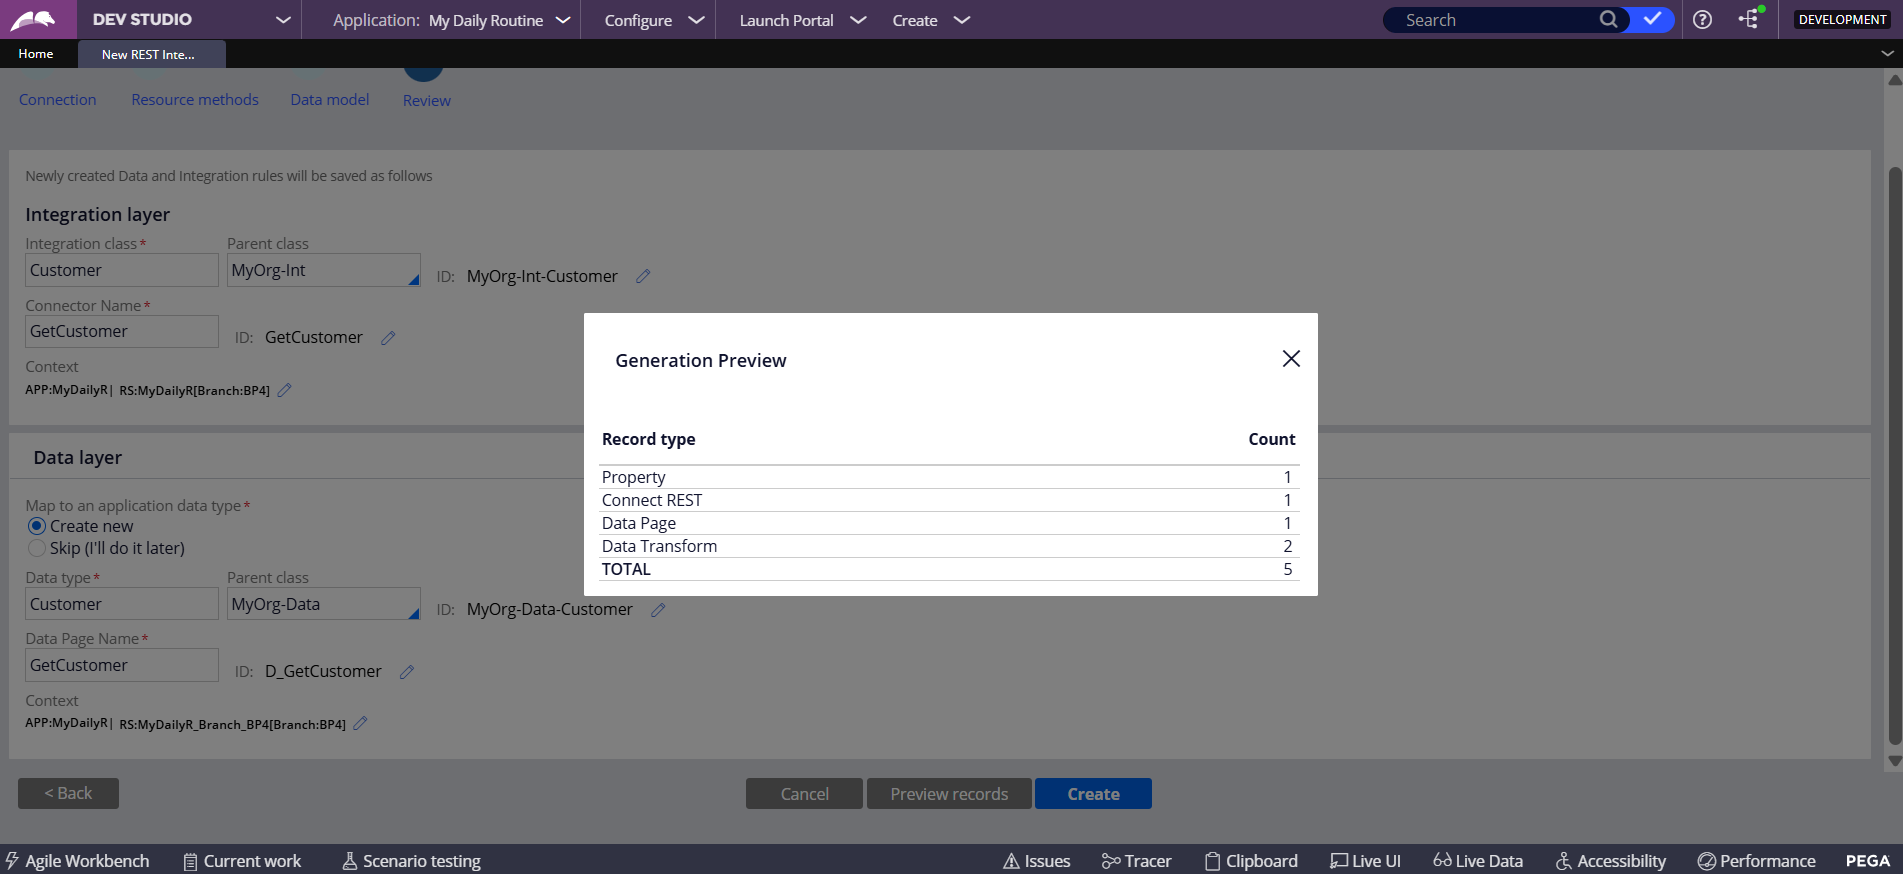
Step 5: Review & Generate
The 'Generation Preview' screens summarize the rules to be created: 1 Connect REST, 1 Data Page, 2 Data Transforms, and the necessary Classes.
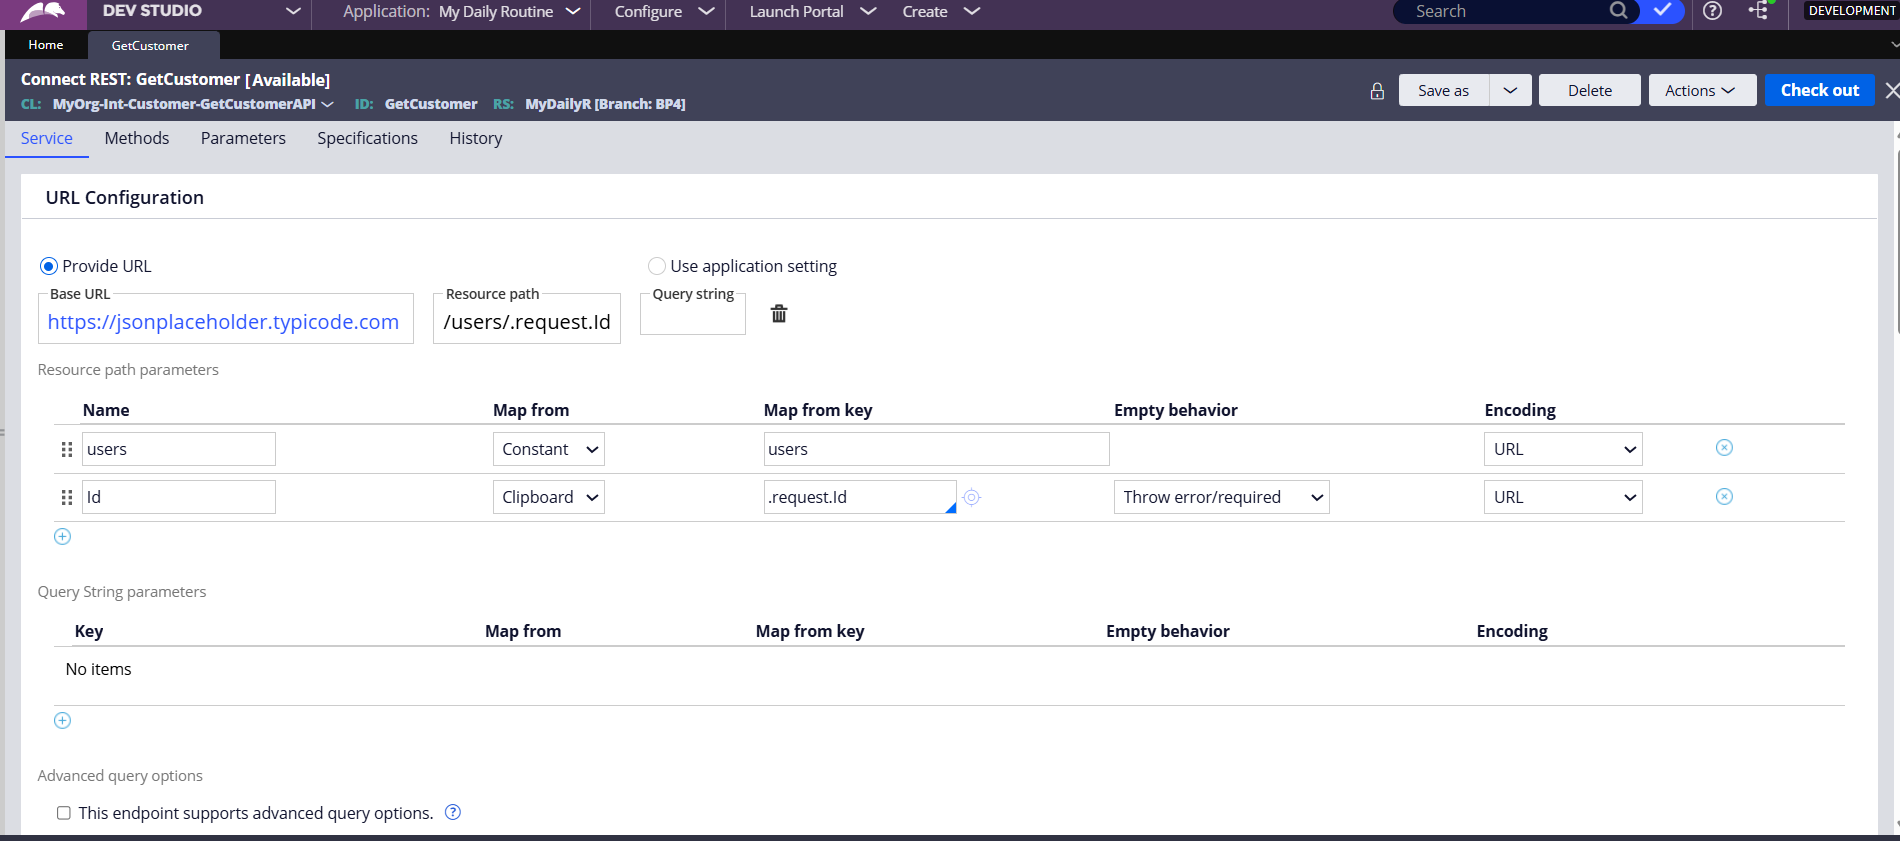
Artifact: Connect REST Rule
The wizard creates a Connect REST rule. This rule handles the technical details of the HTTP request, including URL mapping for the resource path.
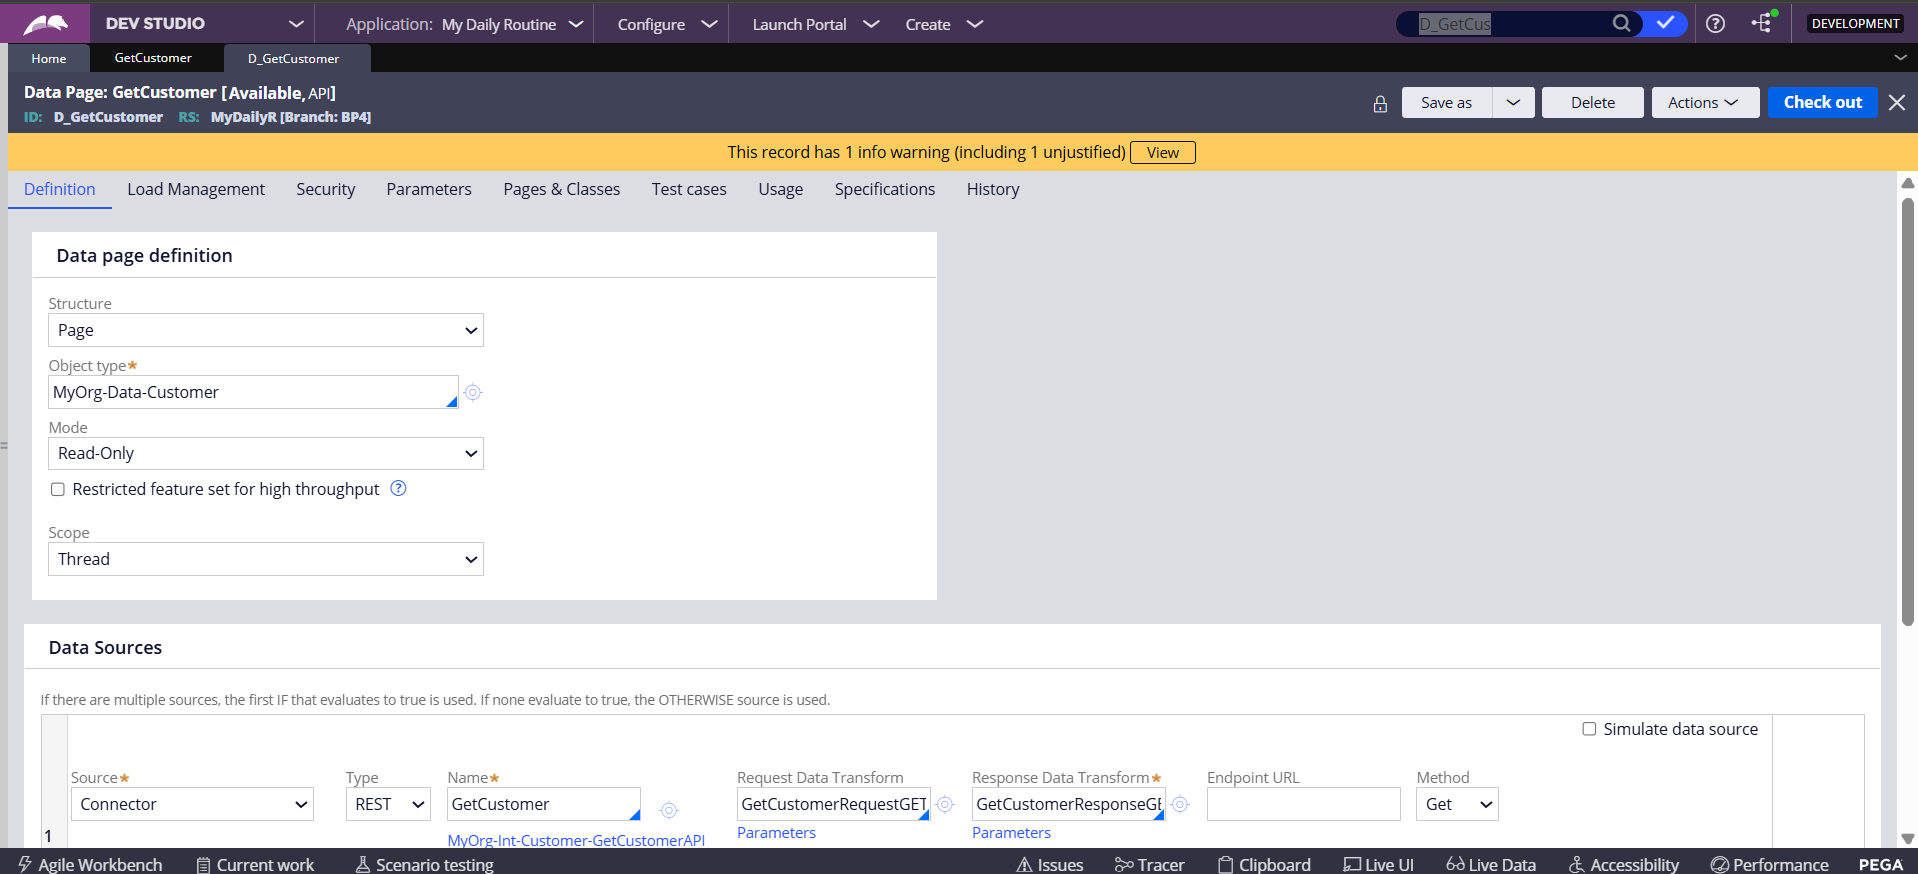
Artifact: Data Page
A Data Page (D_GetCustomer) wraps the connector. This separates the integration logic from the UI, making data easy to consume anywhere in the app.
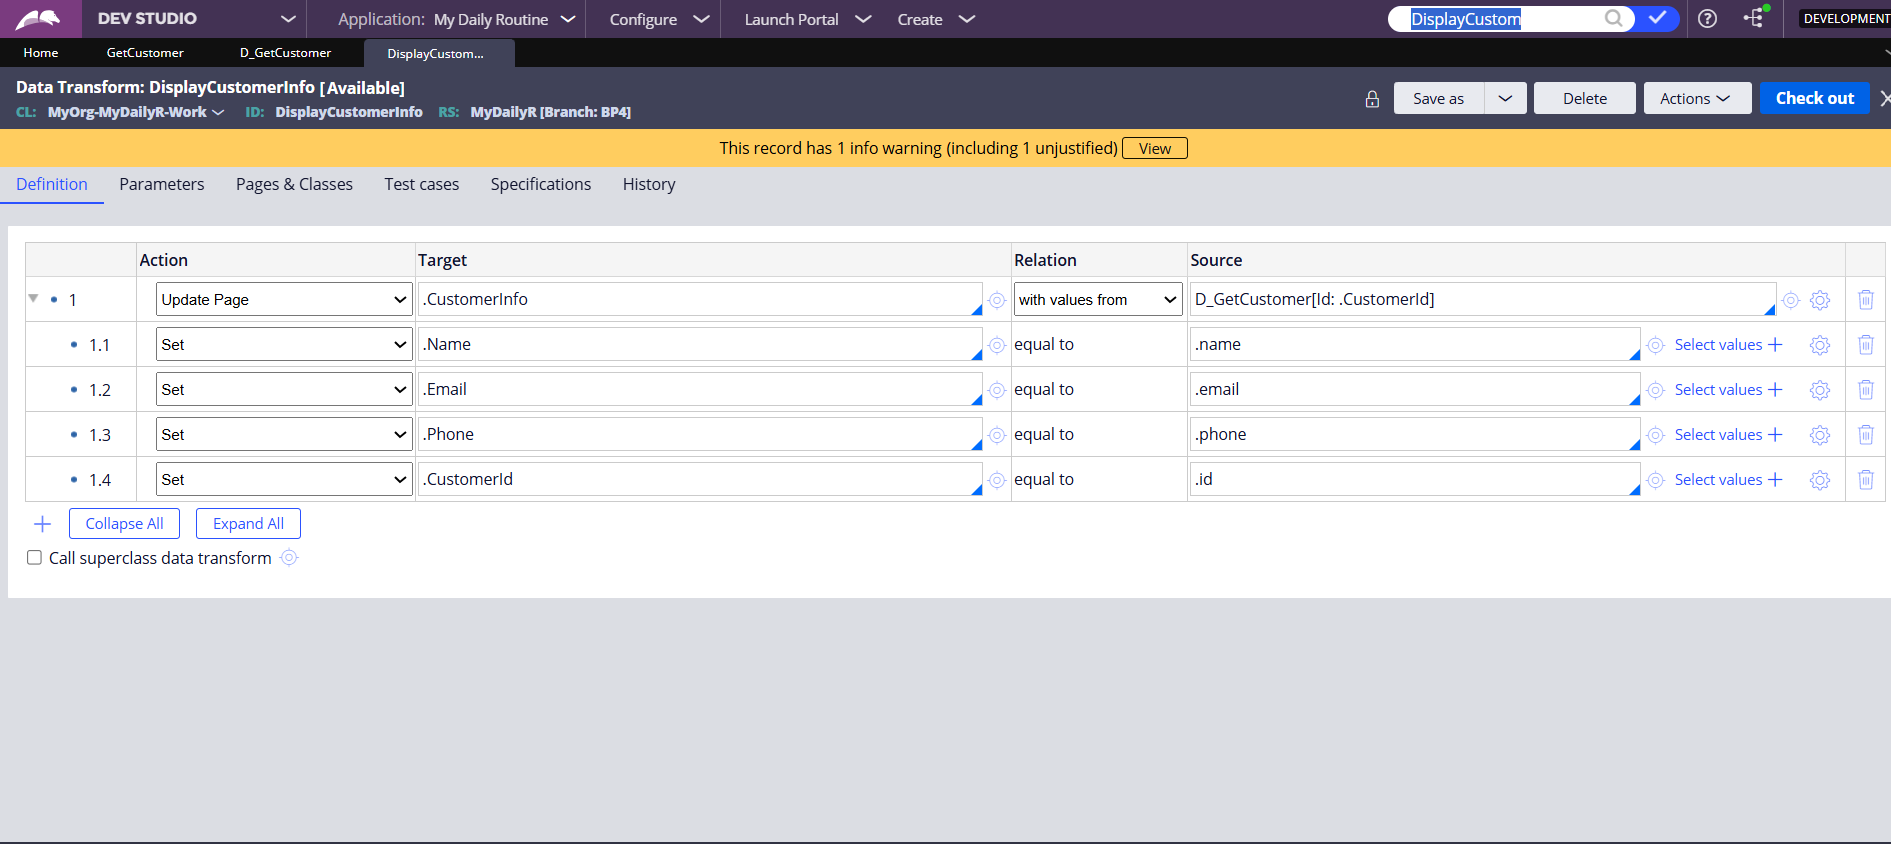
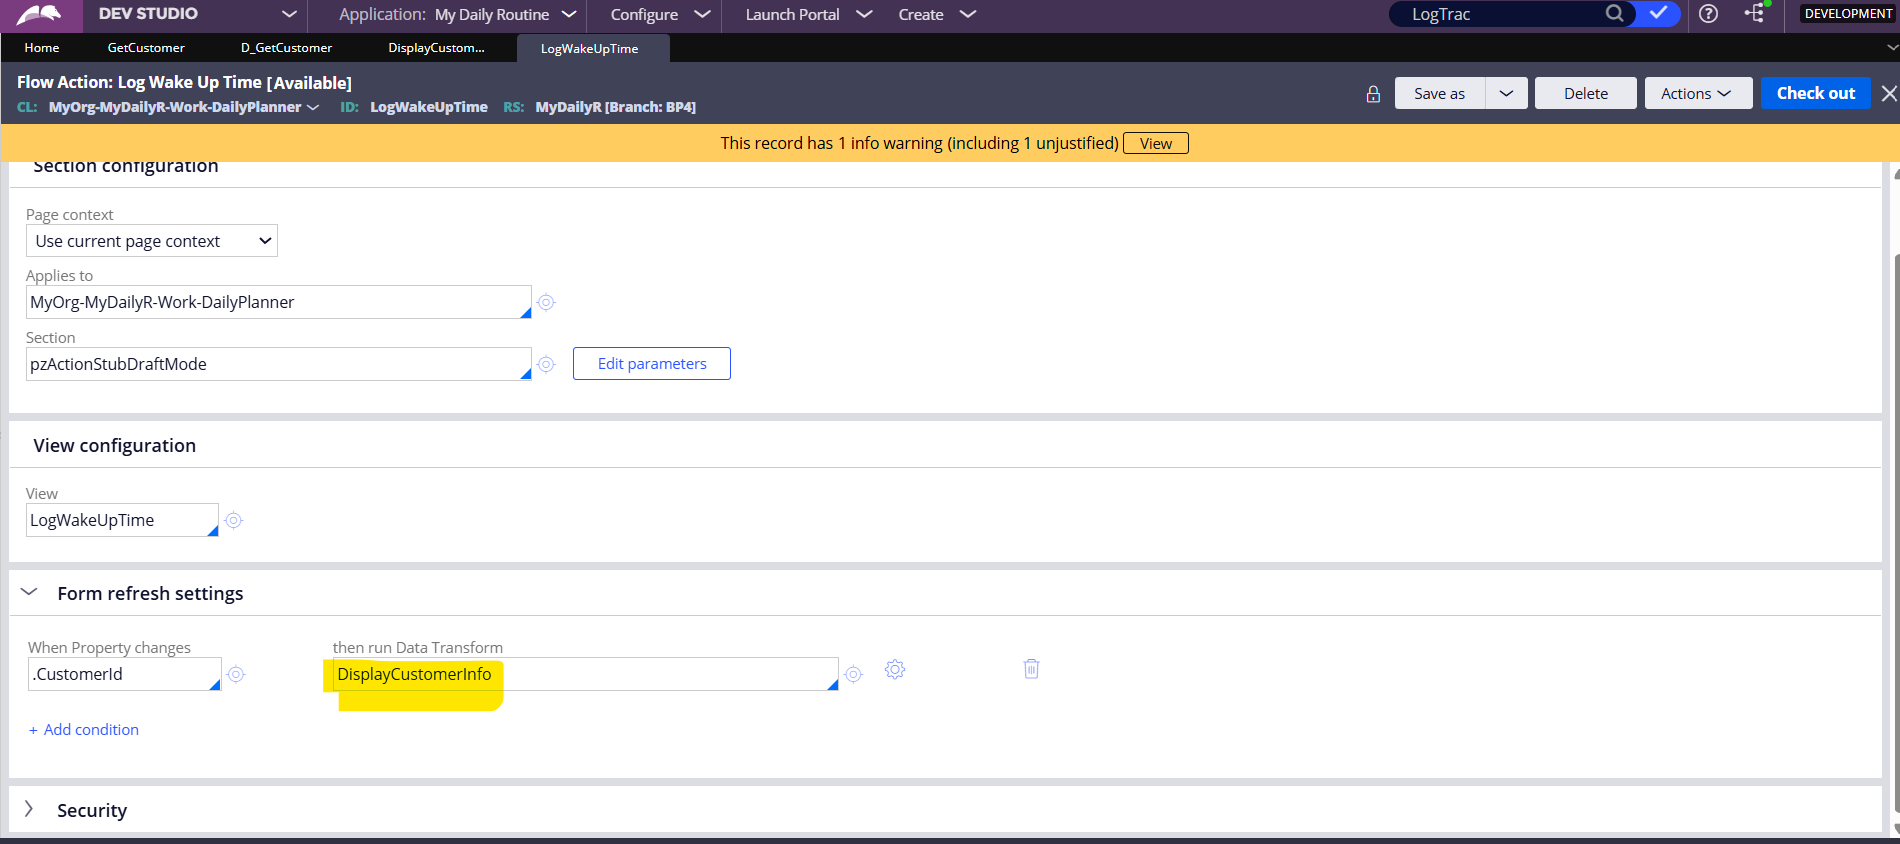
Logic: Data Mapping
A Data Transform (e.g., 'DisplayCustomerInfo') is used to map properties from the Integration Data Page to your Work Object context.
Implementation: UI Triggers
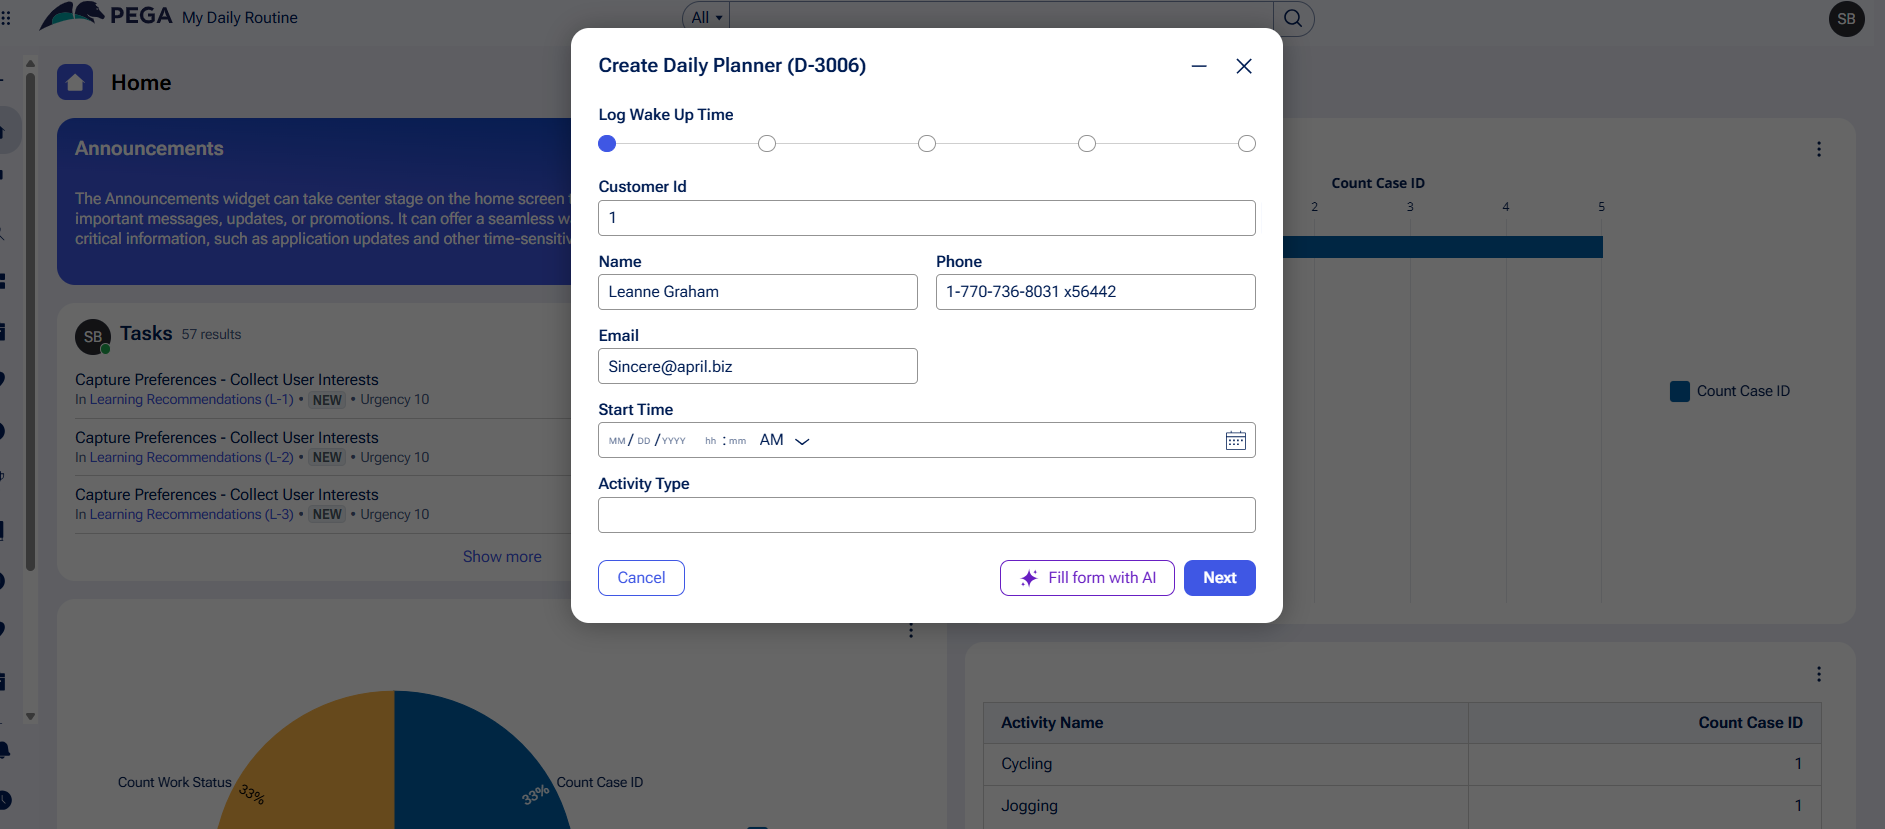
On the user interface, we configure an event: when the 'Customer Id' changes, the Data Transform runs to fetch and populate the fields.
Final Result
- pega
- pega-constellation
- rest-api
- integration
- low-code
- api-tutorial
- dev-studio