


Mastering Google Slides: Guide to Professional Sales Pitches
Learn how to create, format, and edit high-impact sales presentations in Google Slides with this step-by-step professional workflow.
How to Create, Format, and Edit Presentations
A step-by-step workflow: Create, Format, Edit
Workflow: Create, Format, Edit
1. CREATE: Plan Structure & Content
2. FORMAT: Themes, Fonts & Colors
3. EDIT: Refine Text, Media, & Data
4. REVIEW: Polish & Rehearse
Step 1: CREATE - Plan Your Narrative
Define the 'Big Idea': What problem are you solving for the client?
Structure the flow: Hook → Problem → Solution → Evidence → Call to Action.
Do not open Google Slides yet. Use a Google Doc to outline text first.
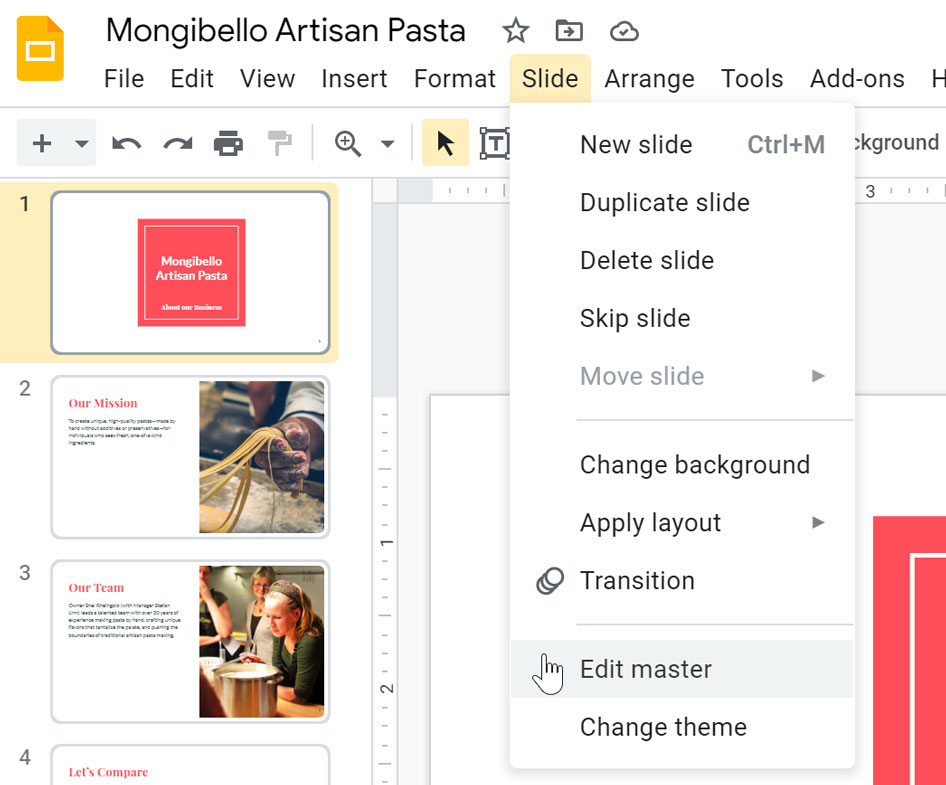
Step 2: FORMAT - Set the Master Theme
Don't format slide-by-slide. Go to Slide > Edit Theme to format the entire deck at once.
Set your corporate fonts (e.g., Roboto, Open Sans) on the master layout.
Place logos on the master slide so they appear automatically on every new slide.
Step 3: EDIT - Text & Layout Basics
Insert Text Properly: Use standard layouts (Ctrl+M) rather than drawing manual text boxes for better consistency.
Focus on Hierarchy: Use concise headers and bullet points. Avoid long paragraphs.
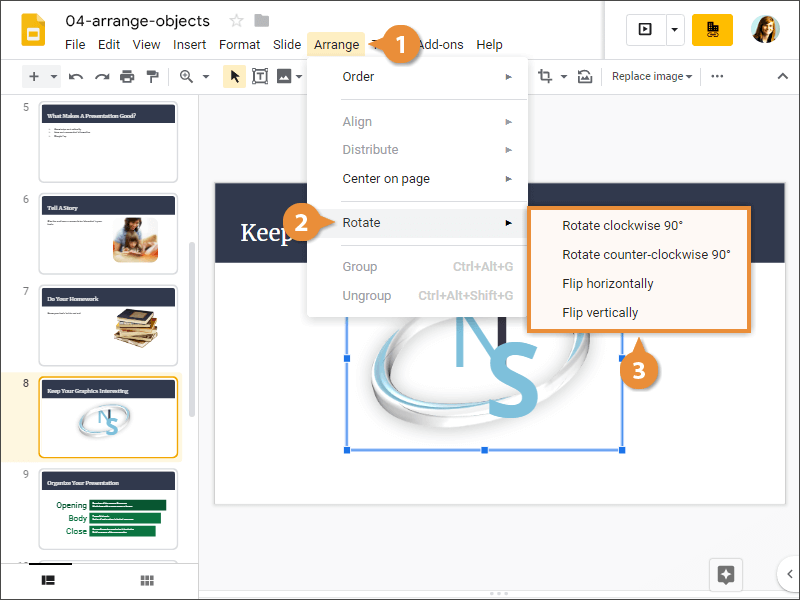
Align Objects: Select multiple items and use Arrange > Align to make them organized.
Step 3: EDIT - Visualizing Data
Avoid tables purely with text. Use Insert > Chart to visualize growth. This example shows quarterly revenue growth, a staple in sales pitches.
Step 3: EDIT - Working with Media
Use 'Insert > Image > Search the web' for quick royalty-free assets.
Crop images to shapes (Masking): Select image > Crop arrow > Shapes > Circle.
Step 4: FORMAT - Polish & Align
Nothing ruins a professional deck faster than misaligned boxes. Do not eyeball it.
Select multiple objects → Right Click → Align (Center/Middle) or Distribute.
Step 4: FORMAT - Transitions & Motion
Keep it Professional
Avoid 'Cube', 'Flip', or 'Gallery'. Use 'Fade' or 'Simple Slide' for professional sales decks.
Object Animation
Use 'Appear' on click to reveal bullet points one by one. This keeps the audience focused on what you are saying now.
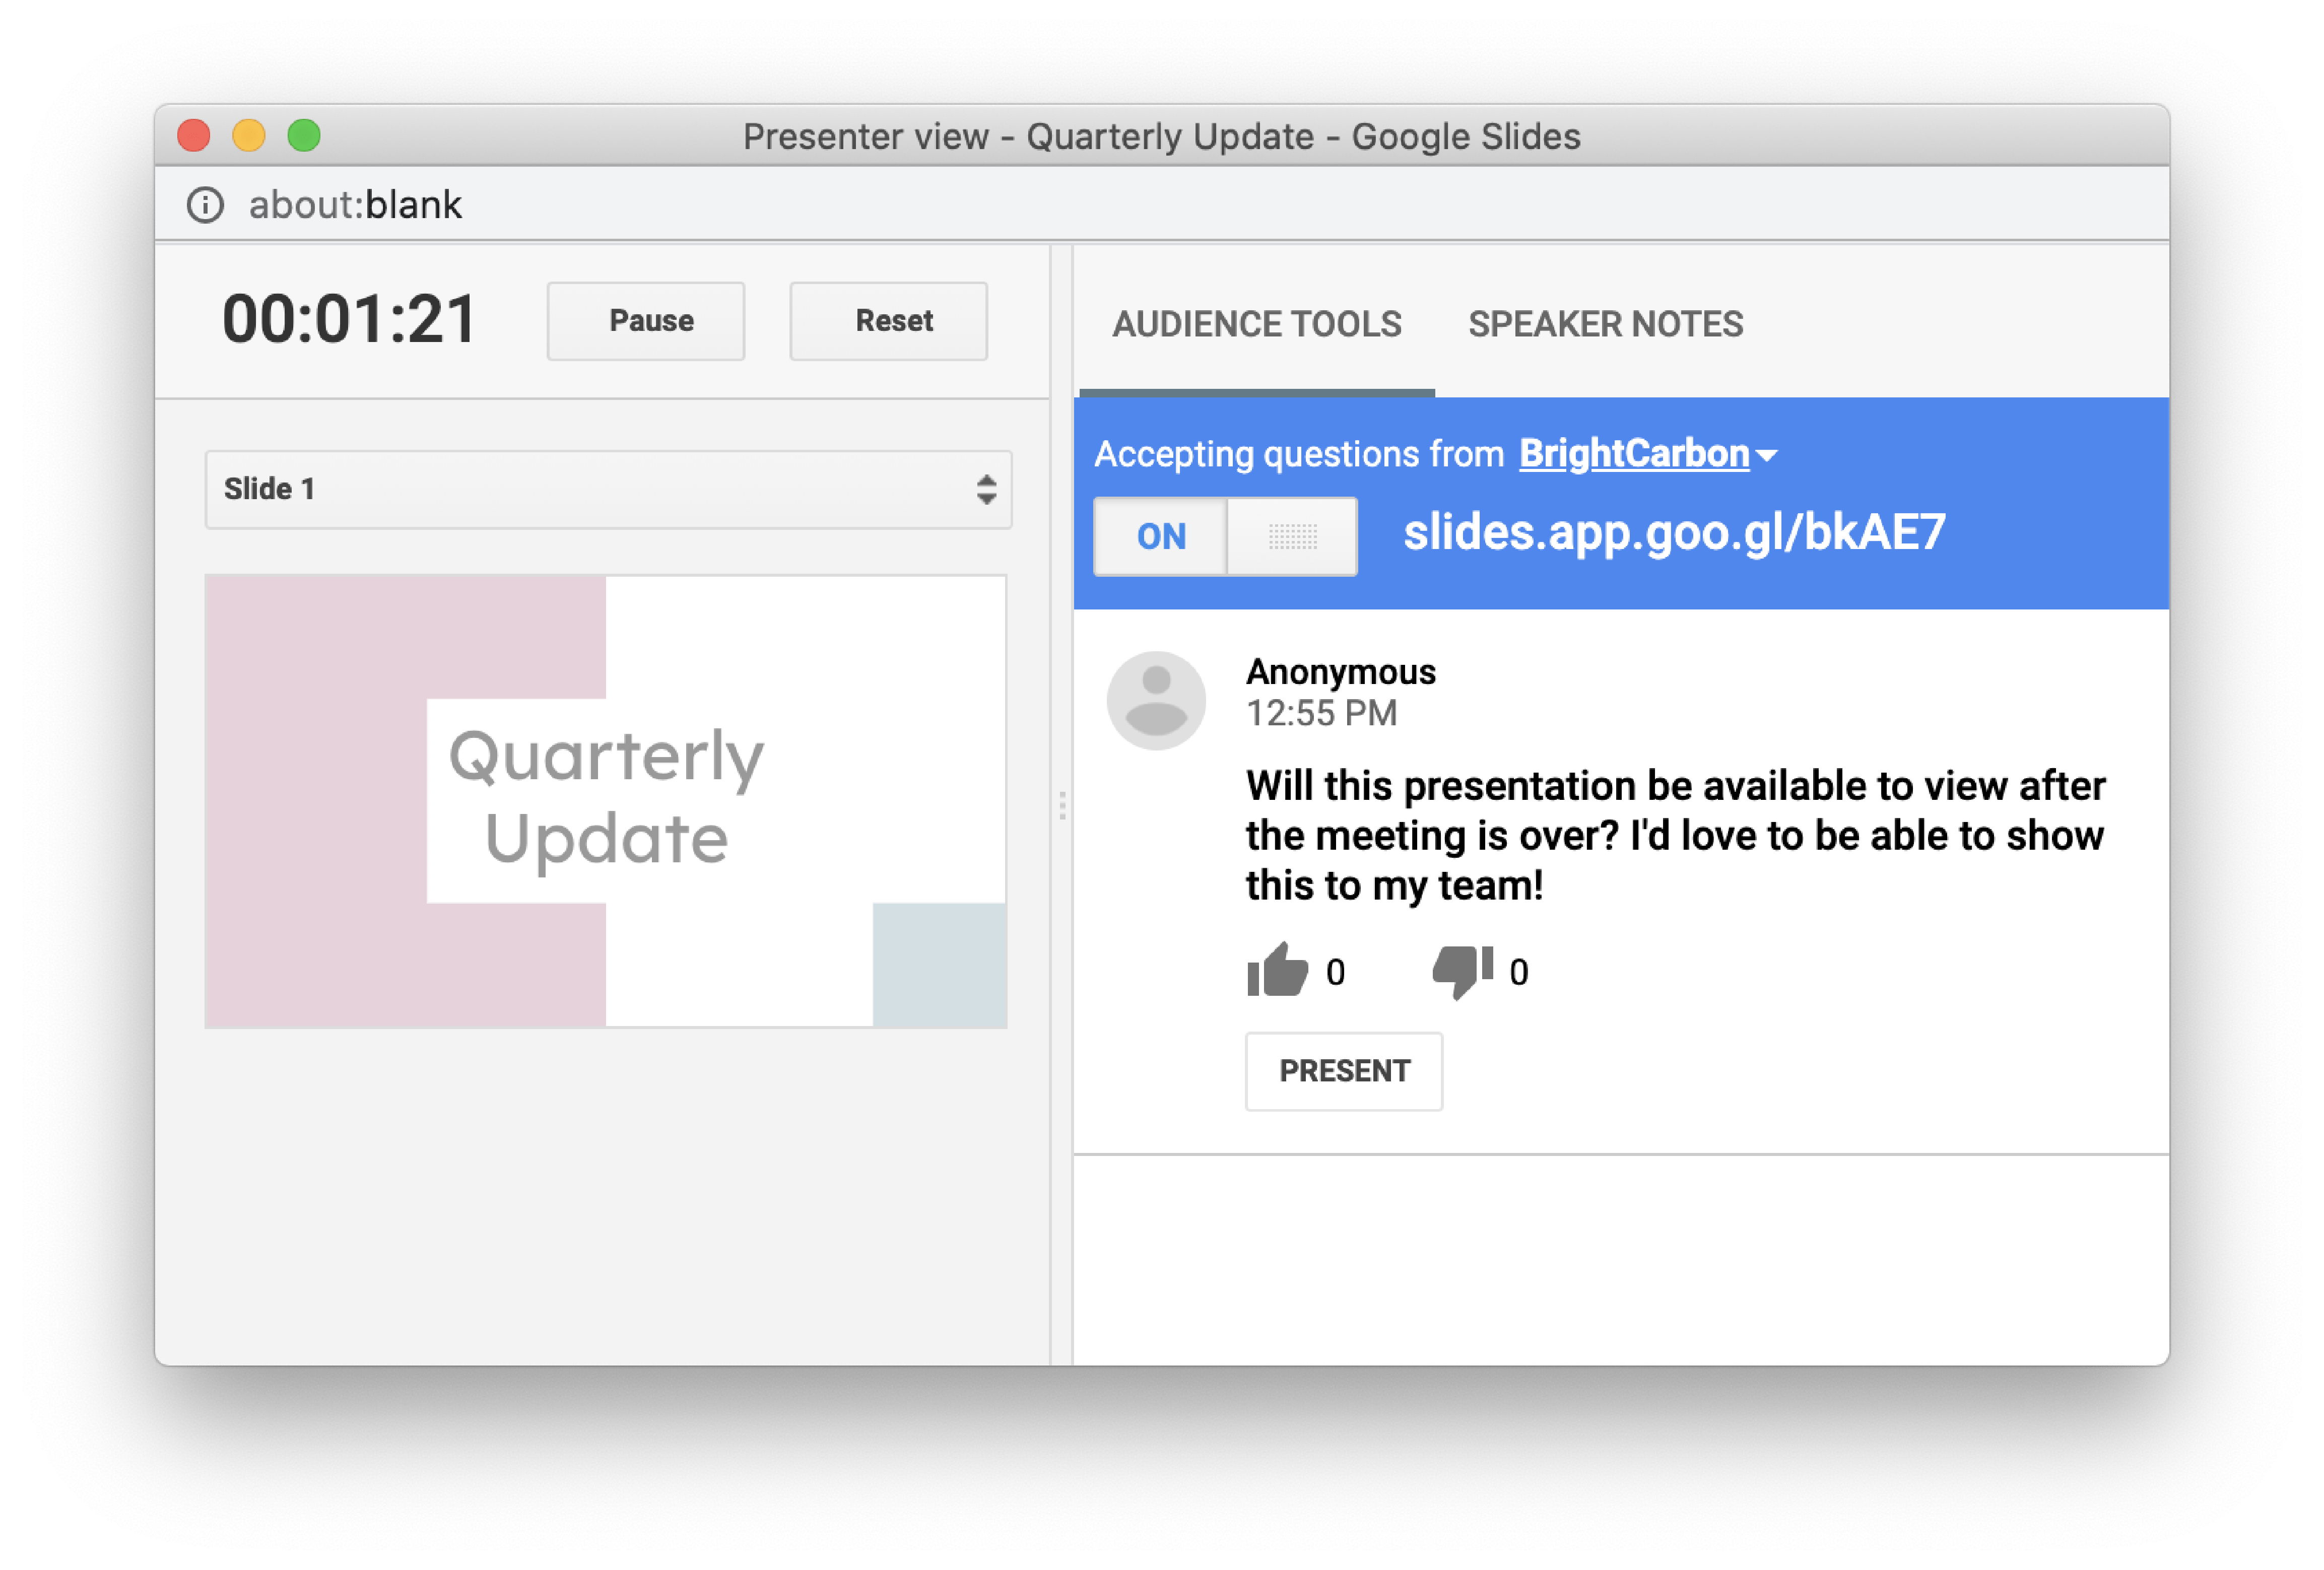
Phase 4: Rehearse with Presenter View
Don't read off your slides. Use 'Presenter View' (Arrow next to Slideshow button). It shows you the timer, upcoming slides, and your private Speaker Notes while the audience only sees the main content.
Engaging the Audience: Q&A Tools
Google Slides has a built-in Q&A tool. Turning this on creates a link where your audience can submit questions in real-time.
Recap: The Winning Formula
PLAN: Outline in Docs first.
BUILD: Use 'Edit Theme' & Grid.
POLISH: Check alignment.
REHEARSE: Use speaker notes.
Ready to build your deck? Open slides.new to start.
- google-slides
- sales-pitch
- presentation-skills
- pitch-deck
- marketing-strategy
- tutorial
- business-productivity